Pages

Showing posts with label Beate's Weekend Sketch Challenge. Show all posts

Saturday, October 10, 2009

Crazy 4 Thanksgiving

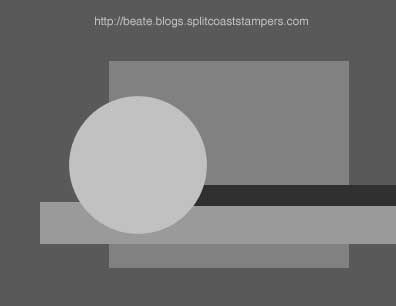
Happy Saturday, everyone! It's time for another challenge this week at the Crazy 4 Challenges blog. This is not only my sample for this week's C4c challenge, but it also my submission for the Weekend Sketch Challenge #101 at Beate Johns' blog. I used the acorn and the sentiment from Verve's set "Tall Oaks", and combined the images with some of the Juntos Designer Series Paper. My color combination for this warm fall card was More Mustard, Very Vanilla, Really Rust, and Always Artichoke. I used my Spellbinders' Nestabilities to create the focal and circular panels. I distressed the inside of the focal panel with a Sponge Dauber, then added some piercing with a Mat Pack and Paper Piercer.

This month our very own Vicki Garrett is bringing us the challenges each Saturday...and you will not want to miss any of them! We have had such an amazing turnout for the challenges, and I personally want to thank you for making this new challenge site a HUGE success! I have had so much fun working with amazing women of this design team, and I know you all are enjoying their fantabulous samples each week, too! I'm sure they will not disappoint this week either...so go check them out, and give them some love:


You may have noticed that a couple of the regular ladies aren't with us today...Joycelyn and Robin are having internet problems, but they will be joining us again at a later time. MISS YOU GUYS! That's it for me today...thanks for stopping by! Now hop on over to C4C, and join us in this amazing challenge! I will see you all back here tomorrow with another card or project. Until then...
Supplies
Stamps: Tall Oaks (Verve)
Papers: More Mustard, Very Vanilla, Always Artichoke, Juntos DSP
Inks: More Mustard, Always Artichoke, Basic Black Craft
Accessories: clear embossing powder, heat gun, copics, nesties, big shot, sponge dauber, scissors, dimensionals, mat pack, paper piercer

Thursday, September 24, 2009

...Fall and Winter

This first card was one that I made to upload into the Verve Gallery during the release of the new September stamps. I stamped the I Chronicles 16:34 Plain Jane in Chocolate Chip Craft Ink, then embossed it with Clear Embossing Powder on the Tangerine Tango Cardstock base. I used the patterned papers from My Mind's Eye Out & About collection, then ran them through the Sizzix Big Shot with the Top Note Die. I cut the outer edge from the papers, then cut a piece of Chocolate Chip Cardstock with the same die to use as a mat. I attached the finished panel to the base, then tied a piece of Tangerine Tango Striped Ribbon around it after three Antique Brass Brads were added to the upper left-hand side. If you can't tell...I LURVE me some VERVE! LOL!

This last card is my submission for last Friday's Weekend Sketch Challenge #98 at Beate John's blog. I used one of the new sets from Our Craft Lounge called Snow Place Like Home along with some patterned papers from My Mind's Eye Penny Lane collection. The two papers were stitched together using the Janome Mini Sewing Machine, and the edges were pierced with a Mat Pack and Paper Piercer. The penguin, tree, and sentiment were stamped in Basic Black Craft Ink, then they were embossed with Clear Embossing Powder. I colored the tree with an Aquapainter and Chocolate Chip and Kiwi Kiss Classic Ink Pads. The ground on the focal panel was sponged with a Sponge Dauber and Baja Breeze Classic Pad, then Icicle Stickles were added the tree and over the ground. A Baja Breeze Corduroy Button and Linen Thread were added as the circle element to finish off the card.

That's it for me today! We have a new eight-week-old Chocolate Lab fur baby as of last night, so it is up to me to get her house-broken. She has been a total doll...no whining or whimpering, but I swear it is like having a new baby in the house! LOL! Every little move she makes wakes me up. So needless to say, I didn't sleep very well last night...so while Maggie and her daddy take a nap I think I'll lie down and take one myself! Here's a picture of Maggie-May for you all the "ooooo" and "aaahhh" over! :)
Thanks for stopping by to see me today, and I will be back here tomorrow with another creation...and maybe some more Maggie pictures, too! Until then...
Supplies
"Give Thanks" Card
Stamps: I Chronicles 16:34 (Verve)
Papers: Tangerine Tango, Chocolate Chip, Out & About DP(My Mind's Eye)
Inks: Chocolate Chip Craft Ink
Accessories: big shot, top note die, ribbon, brads, scissors, clear embossing powder, heat gun, mat pack, paper piercer
"Snow Place Like Home" Card
Stamps: Snow Place Like Home (Our Craft Lounge)
Papers: Regal Rose, Baja Breeze, Whisper White, Penny Lane DP (My Mind's Eye)
Inks: Basic Black Craft Ink, Baja Breeze, Kiwi Kiss, Chocolate Chip
Accessories: mat pack, paper piercer, dimensionals, sewing machine, thread, clear embossing powder, heat gun, aquapainter, scissors, sponge dauber, stickles, button, linen thread

Saturday, July 18, 2009

...Live, Laugh, Love

I told you that I have been busy with sketch challenge cards, and here is another to share with you. This sketch was brought to us by Lori Craig for the Weekend Sketch Challenge #89. It shouldn't come as any surprise that I am once again using the new SU In Colors. These are called Bermuda Bay (turquoise) and Soft Suede (brown). Along with new In Colors comes new Designer Series Paper packs...and you all know how much I love me some paper! LOL! The pack showcased is no different. It is called Thoroughly Modern, and has the following colors included in the papers: Rose Red, Bermuda Bay, Soft Suede, and Sahara Sand. I used the same stamp set from There She Goes as yesterday, but instead of stamping flowers I punched some out using the Trio Flower Punch. The centers of the flowers are actually Turquoise Rhinestone Brads. I finished off this creation with a piece of the new Soft Suede Dotted Ribbon.

That's it for today! I'm at home stamping with Pam V again today, so I will have several cards to share this upcoming week, too....whoohoo! Thanks for stopping by, and I will see you all tomorrow! Until then...
Supplies
Stamps: Act of Kindness (There She Goes)
Papers: Bermuda Bay, Soft Suede, Whisper White, Thoroughly Modern DSP
Inks: Soft Suede
Accessories: dimensionals, ribbon, nesties, big shot, trio flower punch, ice circle rhinestone brads, mat pack, paper piercer

Tuesday, May 19, 2009

...Nuts About You (WSC81)

Ready for another Greeting Farm card? This one was my submission for the Weekend Sketch Challenge #81 hosted this week by Charmaine Ikach. I started with a Regal Rose Cardstock base, then matted each additional layer with a combination of Regal Rose Cardstock and Chocolate Chip Cardstock. The edges of the large Pumpkin Pie Cardstock panel and the Whisper White Cardstock panel were pierced using the Mat Pack and Paper Piercer. The striped patterned paper was from the Sweet Always Designer Series Paper pack. The image was from the stamp set "Forest Friends", and it was stamped onto Whisper White Cardstock in Basic Black Craft Ink. It was also embossed, then colored with Copic Sketch Markers. The image was cut out and popped off of the focal panel that had been sponged with Kiwi Kiss Classic Ink and a Sponge Dauber. The only embellishments used were a Chocolate Chip Corduroy Button, Linen Thread, and Brown Rhinestones.

That's it for now! I will be posting another card later on, so be sure to come back and check it out! Thanks for stopping by, and until later...

Saturday, April 18, 2009

...Inspired Sketch Card

This was my submission for a couple of challenges this weekend: the Inspiration Challenge #176 at SCS, and Beate's Weekend Sketch Challenge #77 that was hosted by Lori Craig for this weekend. The inspiration piece were the Tropiq Matches from Skeem's Website. I started with a Tangerine Tango Cardstock base, then matted each additional layer with Taken With Teal Cardstock. The large green panel was Kiwi Kiss Cardstock that had been pierced with a Mat Pack and Paper Piercer. The Whisper White Cardstock focal panel was also pierced, then the leaves from the set "Petal Pizazz" were stamped in . The flowers were from the same set, and they were stamped on a Kiwi Kiss Classic Ink scrap piece of white cardstock in Tangerine Tango Classic Ink and Taken With Teal Classic Ink. After the flowers were cut out using CutterBee Scissors, they were popped off of each other using Dimensionals. An Antique Brass Build-a-Brad was added to the center of the bloom, then the flower was attached to the focal panel using Dimensionals also. The sentiment was from the set "Very Versatile", and was stamped in teal ink using a Stamp-a-ma-jig and Image Sheet for proper placement. The only other embellishments used were 5/8" Tangerine Tango Striped Grosgrain Ribbon and Linen Thread.

Thanks for stopping by, and I will be posting another card in just a few for Jen del Muro's Sketch For You To Try that was posted today. Until then...
Supplies
Stamps: Petal Pizazz (SU!)
Papers: Tangerine Tango, Taken With Teal, Kiwi Kiss, Whisper White
Inks: Tangerine Tango Classic, Taken With Teal Classic, Kiwi Kiss Classic
Accessories: mat pack, paper piercer, dimensionals, scissors, build-a-brad, ribbon, linen thread, SAMJ, image sheet

Saturday, March 28, 2009

...Feelin' Froggy

Don't forget to place your vote for which watermark I should use for the next few months HERE...you could win a FREE STAMP SET from the upcoming Occasions Mini Catalog if your name is chosen!
This was my submission for Beate John's Weekend Sketch Challenge #74. This week's sketch was provided by this week's hostess, Charmaine Ikach of Oodabug Alley. I started with a Kiwi Kiss Cardstock base, then matted each additional layer with a combination of Kiwi Kiss Cardstock and/or Pacific Point Cardstock. The striped paper was from the Muirfield Designer Series Paper pack. The sweet frog are from Stamping Bella's new KETTO stamp line, and they are called "Froggy". The sentiment panel was created using a multi-word set from Impression Obsession called "Sentiments II". It was stamped in Basic Black Craft Ink onto a scrap piece of Kiwi Kiss Cardstock, then embossed with Clear Embossing Powder and a Heat Gun. The sentiment was punched out using the Large Oval Punch. The blue piece on the bottom of that panel was punched out with the Curly Label Punch, then cut in half to create a scallop along the lower edge.

What do you think of the focal panel? The only stamps used were the frogs, and yours-truly created the rest with Copic Sketch Markers! I am so flippin' proud of the way it all turned out...I hope you all are, too! The frogs were stamped and embossed on a piece of White Georgia Pacific Cardstock, then colored with Copic Sketch Markers. Several Silver Brads were the only embellishments I used in order to create a more masculine feel to the card. The mats for the brads were created using a 1/4" Circle Punch and a 3/8" Circle Punch. Each layer was attached using Dimensionals.

That's it for now! I may have more to share later in the day...depending on how much housework I get finished. :) Until then...

Supplies
Stamps: Froggy (Stamping Bella), Sentiments II (Impression Obsession)
Papers: Kiwi Kiss, Pacific Point, GP White, Muirfield DSP
Inks: Basic Black Craft
Accessories: ruler, copic sketch markers, black SU! marker, clear embossing powder, heat gun, glaze pen, brads, punches (large oval, curly label, 1/4" circle, 3/8" circle), dimensionals

Saturday, March 7, 2009

...Another Occasions Mini Sneak Peek

This is my submission for both Kristina Werner's Color Inspiration #44, and Beate's Weekend Sketch Challenge #71 {created by Sharon Harnist this week}. I started with a Close to Cocoa Cardstock base, then matted each additional layer with Chocolate Chip Cardstock. The large pink background panel was a piece of Pink Pirouette Cardstock that had been pierced around the edges using a Mat Pack and Paper Piercer. The patterned paper used on the horizontal panel was from the Bella Rose Designer Series Paper pack. The focal panel was created by stamping the leaves from the new set "Great Friend" in Pink Pirouette Classic Ink onto Whisper White Cardstock. The sentiment was created using stamps from the same set, and also using a Stamp-a-ma-jig and Image Sheet for proper placement on a piece of Pink Pirouette Cardstock. The words were stamped in Chocolate Chip Craft Ink, then embossed using Clear Embossing Powder and a Heat Gun. The completed sentiment panel was cut out using CutterBee Scissors, then attached to the white panel using Dimensionals.

The butterfly was from the Level One Hostess Set called "God's Beauty", and it was also stamped in Chocolate Chip Craft Ink, then embossing with Clear Embossing Powder and a Heat Gun. I colored the wings with a Blender Pen and the Pretty in Pink Classic Ink Pad. I then colored over the classic ink with my Sakura Gold Glaze Pen to add some subtle "sparklage" {as my children would say}. It was also cut out and mounted to the white panel using Dimensionals. Three Dark Brown Half Pearls were added to the focal panel to complete the card.

That's it for now! I am working on some other challenge cards, so I may have something else to share before the day is out. Thanks for stopping by, and I will see you all later! Until then...


Supplies
Stamps: God's Beauty, Great Friend
Papers: Close to Cocoa, Chocolate Chip, Whisper White, Pink Pirouette, Bella Rose DSP
Inks: Pink Pirouette, Pretty in Pink, Chocolate Chip {Craft}
Accessories: mat pack, paper piercer, embossing buddy, clear embossing powder, heat gun, blender pen, scissors, SAMJ, image sheet, dimensionals, pearls, glaze pen

Saturday, November 8, 2008

...Another Inspired Sketch


This is my submission for both Beate's Weekend Sketch Challenge #65, and for SCS's Inspiration Challenge #153. The sketch is pretty self-explanatory, but the inspirational piece comes from Boden USA's clothing website. I just loved the colors on THIS pair of galoshes...so rich and fall-like. I decided that a Thanksgiving card would be the best way to go with theses fall colors.

I used the set "Autumn Harvest" from Stampin' Up!, and stamped it in Jet Black Staz-On Ink onto a piece of 90 lb. Watercolor Paper. The gourds were then watercolored using an Aquapainter and the following Stampin' Write Markers: Chocolate Chip, Old Olive, Pumpkin Pie, Only Orange, Summer Sun, and Going Gray. The sentiment, from "Holidays & Wishes", was stamped in the black also using a Stamp-a-ma-jig and Image Sheet for proper placement. The leaf from the set was watercolored on a scrap piece of watercolor paper, cut out using CutterBee Scissors, then attached to the focal image with a Dimensional.

The completed panel was matted with Tangerine Tango Cardstock and Chocolate Chip Cardstock. A circle was cut from a piece of patterned paper from the Frosty Day Designer Series Paper pack using the Coluzzle Cutting System. I faux stitched the edge with a Mat Pack, Paper Piercer, and Chocolate Chip Stampin' Write Marker. It was attached to the Kraft Cardstock base using SNAIL Adhesive. The focal panel was attached to the base using Dimensionals. Instead of adding another circle panel in the upper left corner of the focal panel, I added a piece of Silver Swirl Hardware with a piece of 5/8" Tangerine Tango Striped Ribbon tied to it.

That's it for now! I have a couple of other sketches to work on, so I may have one or two more things to post later on today. If not, I will see you all here tomorrow with a card for the Featured Stamper Challenge at SCS.


Supplies
Stamps: Autumn Harvest, Holidays & Wishes
Papers: Kraft, Chocolate Chip, Tangerine Tango, Watercolor, Frosty Day
Inks: Jet Black Staz-On
Accessories: coluzzle cutting system, mat pack, paper piercer, markers, aquapainter, scissors, dimensionals, stamp-a-ma-jig, image sheet, ribbon, hardware

Saturday, November 1, 2008

...Stippled Inspiration Sketch


This is my submission for Beate's Weekend Sketch Challenge #64, and also for today's Inspiration Challenge #152 at SCS. I used the Stampin' Up sets "Inspired By Nature" and "Lovely Labels" for Don Li-Leger inspired card. I was inspired most by his "Karma" wall hanging...love, love, love those colors! The grass was embossed on the Riding Hood Red Cardstock base with Black Embossing Powder, as were the flowers on the Summer Sun Cardstock panel. I wanted to give the background the look of a sunrise, so I used Stipple Brushes to add More Mustard Classic Ink and Riding Hood Red Classic Ink to the focal panel. The sentiment was embossed onto Riding Hood Red Cardstock, then was punched out using the 1-1/4" Circle Punch. A Kiwi Kiss Cardstock circle was also punched out using the 1-3/8" Circle Punch. To create the white scalloped pieces, I punched out some Whisper White Cardstock with the Scalloped Edge Punch. I also pierced holes in each scallop using a Mat Pack and Paper Piercer. Some 5/8" Riding Hood Red Striped Ribbon was added to complete the card.
Supplies
Stamps: Inspired By Nature, Lovely Labels
Papers: Riding Hood Red, Summer Sun, Kiwi Kiss, Basic Black, Whisper White
Inks: VersaMark, More Mustard, Riding Hood Red
Accessories: stipple brushes, ribbon, dimensionals, black embossing powder, heat gun, mat pack, paper piercer, punches (1-3/8" circle, 1-1/4" circle, scalloped edge)
I love this card so much that I am actually going to use it as one of my club cards this month. I hope the ladies will love it as much as I do! Our theme for this month is "Beautiful Backgrounds", so I will be using the Stipple Background Technique, the Faux Silk Technique, and maybe even the Colored Soot Stamping Technique. We'll have to wait an see about the last one though...it may be too messy!
That's it for today! I will be working on the rest of my club projects this weekend, but I hope to complete several challenges, too. I still have to work on Jen del Muro's Sketch For You To Try, Taylored Expressions' Cupcake Challenge, and Marie's Combat Boot Challenge. Plus there will be a Featured Stamper Challenge at SCS tomorrow, too...I am going to be one busy stamper! Wish me luck...having bronchitis doesn't help me get as much accomplished as I would like! Until later...

Saturday, October 25, 2008

...Inspired By Beate

...or by her sketch this weekend to be more precise! This is my submission for Beate's Weekend Sketch Challenge #63 and Verve Visual's October Product Parade. I used the Verve Visual sets "Abundant Blessings" and "Thankful Blossoms" with the following color combination: Pumkpin Pie, Kiwi Kiss, and Basic Black. These gorgeous blooms (there are three various sizes in the set) were embossed with Black Embossing Powder, then watercolored using a Pumpkin Pie Stampin' Write Marker and an Aquapainter. Once they were dry, I popped each layer of the flower up using Dimensionals. The leaves were stamped in Kiwi Kiss Classic Ink and cut out. They were attached to the back of the flower using SNAIL Adhesive. The sentiment was stamped in VersaMark Ink, then embossed with Black Embossing Powder. Several Black KaiserScrapbook Rhinestones were added to various places on the card: the center of the flower, the corners of the focal image, and below the sentiment. The beautiful designer paper I used was from Stampin' Up's Urban Garden Designer Series Paper Pack. {By the way...how do you like the photo? It was taken with my new digital camera...and I have to say that I love, love, love it! Canon is the bomb-diggity!}
Supplies
Stamps: Abundant Blessings, Thankful Blossoms (Verve Visual)
Papers: Pumpkin Pie, Basic Black, Whisper White, Watercolor, Urban Garden DSP
Inks: Jet Black Staz-On, Kiwi Kiss, VersaMark
Accessories: embossing powder, heat gun, rhinestones, aquapainter, markers, mat pack, paper piercer, dimensionals, scissors
That's it for today! I will be going to a Halloween party tonight with several friends, but I hope to make a card for both the Inspiration and Featured Stamper Challenges at SCS a bit later. Thanks for stopping by, and until later...

Thursday, July 31, 2008

...More Dirty Dares, A Color Challenge, & A Sketch Challenge

I actually finished three cards yesterday for several challenges that were posted this last week.
This first card was for SCS's Sketch Challenge #187, and also for Carole Burrage's Color Combo Dirty Dare (DTGD08Carole). Here is the supply list for this one:

Stamps: Bundle of Joy, Here For You (Verve Visual)

Paper: Yoyo Yellow, Real Red, Brilliant Blue, Whisper White, Basic Black, Watercolor, Jersey Shore Designer Series Paper

Ink: Jet Black Staz-On, Brilliant Blue

Accessories: Stamp-a-ma-jig, Image Sheet, Scissors, Real Red 5/8" Grosgrain Ribbon, Stampin' Write Markers (Brilliant Blue, Yoyo Yellow), Aquapainters, Dimensionals

The second one is for SCS's Color Challenge #177, and also for Sharon Johnson's Stamp Simply Dirty Dare (DTGD08Sharon). Supplies are as follows:

Stamps: Michael's $1 stamp

Paper: Whisper White (textured), Sahara Sand, Groovy Guava, Whisper White

Ink: Groovy Guava

Accessories: CuttleBug Embossing Folder, Scoring Blade, Taffeta Ribbon, Stamp-a-ma-jig, Image Sheet, Dimensionals

The last card is for Julie Ebersole's Clean & Simple Whites Dirty Dare at SCS. Take a look at the supplies for this one:

Stamps: Baroque BG, Elegant Cheer

Paper: Whisper White, Basic Black, Really Rust

Ink: Really Rust (Craft), Jet Black Staz-On

Accessories: Clear Embossing Powder, Heat Gun, Glue Pen, Rust Glitter, Black KaiserScrapbook Rhinestones, Clear Sealer

That's it for today! Thanks for stopping by. I will be stamping the day away again with my friends, so I hope to have some more goodies to share tomorrow. Until then...


Sunday, April 13, 2008

...Beate's Weekend Sketch Challenge #43


This is my submission for Beate's Weekend Sketch Challenge. I only have one question....what in the world was thinking when I decided to use brads today?!? As you can see, I only used about six hundred (not really, but it sure felt like that many)! I used the sets from Verve Visual called "Fancy Florals #1 and #2". I also used some of the yummy Afternoon Tea Designer Series Papers from Stampin' Up! I wanted to create a "summery" card, so I decided on using Groovy Guava and Certainly Celery for my colors with accents of Basic Black. What do you think? Did I pull it off?


Well I promised that I would post it if I completed it today, so there you have it! I will see you all tomorrow (hopefully) with a creation for the Technique Lovers Challenge. Until then......I'm going to go grab something to eat! Hugs ~ Mercy

Supplies
Stamps: Fancy Florals #1 and #2 (Verve Visual)
Papers: Groovy Guava, Basic Black, Whisper White, Afternoon Tea DSP
Inks: Jet Black Staz-On
Accessories: markers (black, coral, celery), brads, mat pack, paper piercer, dimensionals, adhesive, scissors

Monday, February 4, 2008

...Beate's Weekend Sketch Challenge #33, and Inspiration Challenge #113

This is my submission for two challenges from this weekend: Beate's Sketch Challenge, and the Inspiration Challenge at SCS. The sketch can be seen HERE, and the inspiration piece can be seen HERE. I loved the colors in the picture of the living room, and my mind automatically jumped to this stamp set with these colors. I hope you enjoy it.

I started with a card base of Soft Sky cardstock measuring 8-1/2 X 8, and when folded measures 8-1/2 X 4. The next panel up is made up of Always Artichoke cardstock (2-1/4 X 8-1/8) and Ginger Blossoms Designer Series Paper (2-1/8 X 8). The layers were attached to each other using SNAIL Adhesive, and was then attached to the card base using the same form of adhesive. The flower image from the set "Together Forever" was stamped in Chocolate Chip Classic Ink onto Very Vanilla cardstock three seperate times. The three small and large flowers were cut out using CutterBee Scissors, then attached to each other using Dimensionals. Bashful Blue Brads were added to the center of each of the three flowers, then the completed flowers were added to a 3/4" circle of Always Artichoke cardstock (the 3/4" Circle Punch was used to make the artichoke circle pieces). The flower medallions were attached to the designer paper panel with Mini Glue Dots.

The focal panel is made up of the following cardstocks and measurements: Always Artichoke (2-3/8 X 6-7/8), Chocolate Chip (2-1/8 X 6-5/8), Soft Sky (2 X 1-7/8....three of these), and Very Vanilla (1-7/8 X 1-3/4....three of these, too). All of the images are from the set "Together Forever". The same flower image used to make the flower medallions was stamped onto two of the vanilla pieces in River Rock Classic Ink, then the "&" was stamped using the same color. I used a Stamp-a-ma-jig and Image Sheet to offset the "&" over the first one, then stamped it again in Chocolate Chip Classic Ink to create a bit of a shadow. The "Mr." and "Mrs." were also stamped in chocolate over the flower image on the other two vanilla pieces. A Mat Pack and Paper Piercer were used to pierce a line under each of them. The edges of each image panel were sponged in chocolate ink with a Sponge Dauber. Each layer of the focal panel is attached to the other using SNAIL Adhesive. River Rock Double-Stitched Ribbon was tied in a knot around the bottom of the panel. The sentiment "together" from the set "Everyday Flexible Phrases" was stamped in chocolate ink onto vanilla cardstock. It was then sponged on chocolate ink, and mounted onto sky and chocolate cardstock. The sentiment panel was attached to the focal panel using a Mini Glue Dot under the ribbon. Then the full panel is attached to the card base using Dimensionals.

That's it for today! I hope to see you all tomorrow with a completed Birthday Calendar to show off! Until then.......Hugs ~ Mercy

Supplies

Stamps: Together Forever, Everyday Flexible Phrases

Paper: Soft Sky, Always Artichoke, Ginger Blossoms Designer Series Paper, Chocolate Chip, Very Vanilla

Ink: Chocolate Chip, River Rock

Accessories: brads, adhesive, glue dots, 3/4" circle punch, scissors, dimensionals, sponge dauber, mat pack, paper piercer, ribbon, paper cutter, stamp-a-ma-jig, image sheet

Saturday, January 12, 2008

...Beate's Weekend Sketch Challenge #30, and Inspiration Challenge #110

This is my submission for a couple of challenges: this Weekend's Sketch Challenge from Beate, and today's Inspiration Challenge at SCS. The inspiration piece can be seen HERE, and Beate's sketch can be seen HERE. The card base is Tempting Turquoise that measures 6-5/8" X 6-1/2", and when folded to open at the bottom is 6-5/8" X 3-1/4". The edges were sponged in Chocolate Chip Classic Ink with a Sponge Dauber. The vertical orange panel on the left side is Pumpkin Pie cardstock that measures 3-1/4" X 1-1/16", and a piece of designer paper from BasicGrey's Stella Ruby 6X6 Paper Pad that measures 3-1/4" X 15/16" (the edges were sponged in chocolate also). The two horizontal strips are also from the Stella Ruby collection with the top strip measuring 4-3/8" X 7/8", and the bottom strip measuring 3-1/8" X 3/4". The Photo Corner Punch was used to punch out two pieces of the BasicGrey paper, and the layered corner pieces were attached to each other using SNAIL Adhesive. All of the panels were attached to the card base using the same adhesive.

The flower, from the set "So Much", was stamped in Basic Brown Classic Ink onto Watercolor Paper. It was then watercolored in Tempting Turquoise Classic Ink with Aquapainters. Once dry, the bloom was cut out with CutterBee Scissors, and a 3/16" hole was punched in the center using the Crop-a-dile. A Jumbo Antique Brass Eyelet was placed into the punched hole and closed using the Crop-a-dile again. A Turquoise Rhinestone Brad was added to the center of the jumbo eyelet. The Scalloped Circle Punch was used to punch out a scrap piece of Chocolate Chip cardstock, and the flower was attached to the scalloped circle using Dimensionals. The flower-circle combo was then popped up off of the card base using Dimensionals once more. The sentiment, from the set "Absolutely Fabulous", was stamped in Basic Brown Classic Ink onto the card base to finish it off.

That's it for today! Thanks for checking out my card, and please feel free to leave a comment! I have a bunch of laundry to catch up on, so I will see you all some time tomorrow. Until then.....Hugs ~ Mercy

Supplies

Stamps: So Much, Absolutely Fabulous

Paper: Tempting Turquoise, Pumpkin Pie, BasicGrey's Stella Ruby, Watercolor

Ink: Basic Brown, Chocolate Chip

Accessories: sponge dauber, paper cutter, adhesive, scissors, crop-a-dile, jumbo eyelet, rhinestone brad, punches (photo corner, scalloped circle), aquapainters, dimensionals

Sunday, January 6, 2008

...Featured Stamper #48 & Beate's Weekend Sketch Challenge #20

This is my submission for today's Featured Stamper Challenge at SCS. Today's lucky lady of honor is Nancy Riley (aka stampinat6213 at SCS)...love, love, love her creations! Her original card that inspired me can be seen HERE. She also has a phenomenal blog called iStamp. Her card was a submission for Beate's Weekend Sketch Challenge also, so I had to include those keywords, too. I kept the same card sketch, but changed the colors and the chipboard accent. Before I ever cut my cardstock, I chose to use a Chipboard Heart from the On Board Accents collection from Stampin' Up to make a Valentine's Day card. I used Black Diamond Stickles to coat the entire heart, then used my Heat Gun to dry it quickly. When a heat gun is used the the pieces of glitter actually melt to create a glossy and glittery sheen. When it had dried completely, I then used some Christmas Red Stickles to spread over the dried black heart. I simply squeezed some out in the middle and used my finger to spread the stickles out all over the heart, and then allowed that layer to air dry.

The card base is Real Red cardstock measuring 10-1/2" X 5-1/4", and it was folded in half to open at the right and measure 5-1/4" square. The panels are made up of Basic Black cardstock and BasicGrey's Scarlet's Letter collection. The first layer up from the bottom measures 4-3/4" X 2-3/4" with the designer paper cut at 4-5/8" X 2-5/8". The other two square panels are 3-1/4" square with the designer paper cut at 3-1/8" square. The layers of each panel are attached to each other using SNAIL Adhesive. The sentiment on the bottom square panel is from the set "Wonderful Words", and was stamped in VersaMark along the bottom of the panel. It was then embossed using Black Embossing Powder and a Heat Gun. A piece of Black Organdy Ribbon was tied around the top section of the sentiment panel, and finished in a simple knot. The two lowest layers were attached to the card base using SNAIL Adhesive, but the top panel was popped up off of them with some help from some Dimensionals. The Chipboard Heart was then attached to the top panel using Dimensionals, too.

That's it for today! Thanks for coming by to see me, and I hope to see you tomorrow with a card for the Technique Lovers' Challenge. Until then...Hugs ~ Mercy!

DON'T FORGET TO ENTER TO WIN THE BLOG CANDY IN THE POST BELOW. THE DRAWING WILL BE TOMORROW AT 5:00 PM (EST)!

Supplies

Stamps: Wonderful Words

Paper: Real Red, Basic Black, Scarlet's Letter (BasicGrey)

Ink: VersaMark

Accessories: stickles, heat gun, chipboard heart, adhesive, dimensionals, ribbon

Wednesday, November 21, 2007

...SC151, CC141, and Another Award?!

This is my submission for yesterday's Color Challenge and today's Sketch Challenge at SCS. The card base is Pretty in Pink and measures 11" X 4-1/4", and it is folded in half to measure 5-1/2" X 4-1/4" opening from the bottom. The green mat is Wild Wasabi cardstock (4-1/4" X 3-7/8") that has been embossed using the Textile Texture Embossing Folder from CuttleBug. I used a Sponge Dauber to accentuate the embossing with Wild Wasabi ink, then matted the wasabi onto a piece of scrap Whisper White cardstock that measures 4" X 4-1/4". This panel is adhered to the pink using SNAIL Adhesive, then the panel is outlined at the top using my Mat Pack and Paper Piercer to pierce the pink card base. I also added three Pearl Crystal Stickers to the bottom right of the card base before moving on to the focal image.

The focal image is from the set Lovely As a Tree, and the sentiment is from the set Hugs & Wishes. They are both stamped in White Craft Ink onto Watercolor Paper, then embossed using Ranger's Seafoam White Embossing Powder and a Heat Gun. I then used a sponge dauber to color the background in Pretty In Pink, then used another dauber to sponge the edges in Wild Wasabi. This focal panel measures 4-1/4" X 2-3/8", and is matted with another scrap piece of Whisper White cardstock that measures 4-1/4" X 2-1/2". The focal panel is attached to the wasabi panel with SNAIL Adhesive also. The card is finished by tying some of the Wild Wasabi Double-Stitched Ribbon around the top of the card base. I also added another Pearl Crystal Sticker to the knot of the ribbon.

That's it for the card, but I have more news...


My kindred spirit sistah friend, Debbie Harris, has honored me with the "Encouraging Blogger Award". You can see her nominees HERE. Every blogger hopes that he/she can encourage and inspire those with whom their creations are shared. I have had the awesome privilege of meeting and making some wonderful and lifelong friends through my blogging experience. You are all a huge encouragement to me, and you all give me the inspiration to continue creating artwork and projects that truly come from my heart and soul. I can never repay you for your faithfulness and kind words...I am so honored to call you all my friends! Thanks again, Debbie...what an honor!

That's all for today! Thanks for stopping by to see me, and I will see you all again tomorrow with a card for the Ways To Use It Challenge! Hugs ~ Mercy

Supplies
Stamps: Lovely As A Tree, Hugs & Wishes
Paper: Whisper White, Pretty in Pink, Wild Wasabi, watercolor paper
Ink: same as paper, White Craft Ink
Accessories: embossing powder, heat gun, pearls, paper piercer, mat pack, sponge daubers, ribbon

Friday, November 9, 2007

...Ways To Use It Challenge #139, and Beate's Weekend Sketch Challenge #27

This is my submission for the Ways To Use It Challenge from yesterday, and Beate's Weekend Sketch Challenge. The WT challenge was to use any kind of velvet accessories, so I used my pumpkin velvet ribbon. I tried to get a picture that would show that it is indeed velvet, but it always appears shiny like silk ribbon...so this is as good as it gets! The card base is Not Quite Navy cardstock with mats in Taken With Teal, and Pumpkin Pie. The pumpkin paper is stamped using Tres Chic with the same shade of orange, the edges are also sponged with pumpkin. I punched scrap pieces of teal and navy twice with the Photo Corner Punch. Then I used the two large navy ones, and the two smaller teal ones. I used my mat pack and paper piercer to pierce the teal corner punch out, then I adhered them to the navy ones before adding teal rhinestones to the very corners. They are popping up off of the card by using Dimensionals.

The focal image panel, starting from the bottom, consists of a Not Quite Navy circle and a circle of watercolor paper. I cut both of these circles out using the Coluzzle Cutting System and Templates. I then used my 3/16 Corner Rounder to make the scallops around the edges of the navy circle piece. The focal image is from the hostess set Oh, So Lovely, and it is stamped in Staz-On Black. I used my Aquapainters to watercolor the flowers with Groovy Guava and Basic Brown inks. The background is watercolored with teal, then the edges of the paper is sponged with teal also. Once the paper dried, I attached the watercolor paper to the navy scalloped piece. I used the Horizontal Slot Punch on each side of the focal panel in order to run my pumpkin velvet ribbon through the back of the card onto the front. The ribbon is tied off in simple knots. The sentiment is from the set Fancy Florals by Verve Visual, and it is stamped in Not Quite Navy also. I added a little *sparkle* by outlining the blossoms with a glue pen, and sprinkling Peach Glitter (Making Memories) onto them. The focal panel is then attached to the card using Dimensionals to lift it off of the paper.

Supplies

Stamps: Oh, So Lovely, Tres Chic, Fancy Florals

Paper: Not Quite Navy, Pumpkin Pie, Taken With Teal, watercolor

Ink: Pumpkin Pie, Staz-On Black, Groovy Guava, Basic Brown, Not Quite Navy

Accessories: rhinestones, paper piercer, mat pack, glitter, glue pen, aquapainters, velvet ribbon, dimensionals

...Color Challenge #139, Sketch Challenge #149, and a Class Card

I have a couple of cards to share with you today, and I'll hopefully have a couple more to share tomorrow! This card is for two challenges at SCS from the beginning of this week: Color Challenge #139, and Sketch Challenge #149. The sketch is pretty self-explanatory, but I had to improvise on one element. The challenge called for two square punches turned to look like diamonds on the right side of the card...little problem...I could not get the squares to look right. So I opted to use the Photo Corner Punch instead. I punched out Soft Sky and Ruby Red cardstock twice, so I could have two small blue ones and two large red ones. I used my mat pack and paper piercer to punch holes in the blue ones, then added light blue brads. The blue corners are popped up off of the red ones using Dimensionals. The card is Soft Sky, and the background panel is ruby, and Wild Wasabi. The wasabi piece is stamped using Tres Chic in wasabi ink, and the edges are sponged using the same color. The focal panel is a combination of cardstock starting at the bottom with ruby, then sky, and lastly Whisper White (which is sponged in wasabi around the edges). The floral images and sentiment are from the set Fancy Florals from Verve Visual. These are rubber stamps that can be cut out and used with acrylic blocks...love, love, love them! You can check out their website HERE. I used one flower for the two images in the back: one in wasabi, and one in ruby. I used a different flower for the center and stamped it in sky, then put three light blue brads in the center. Each flower is cut out and layered using dimensionals again. The sentiment is stamped in wasabi in the lower right-hand corner. To finish off the card, I painted some Ice Stickles (Crystal Ice) onto the ends of the blue flower.


This card is one of my November "Versatile VersaMark" class cards. The card is Bashful Blue with a mat of Wild Wasabi and Cutie Pie Designer Paper. I then tied some Wasabi Double-Stitched Ribbon above the panel before adding the focal image. The mat for the focal image is Purely Pomegranate, and the focal image is generation stamped onto Whisper White cardstock in wasabi ink. The edges are then sponged using the same color. The stem image is from the set Stem Silhouettes from the Holiday Mini Catalog. I then used the VersaMark pad to cover the entire image, and sprinkled Glassy Glaze Enamel on top of it to completely cover it. I then used my heat gun to melt the enamel into the VersaMark. I repeated the VersaMark, enamel, and heating two more times. I then placed the panel into the freezer for three to four minutes. When it was removed, the cardstock was curled up due to freezing, so I bent the cardstock backwards to make the enamel crack all over the image. This is the Cracked Glass Technique. I finished off the card by attached the focal image to the pomegranate cardstock, and used Dimensionals to lift it up over the ribbon. My ladies in my class just loved it! I hope you enjoy it, too.


Thanks for stopping by today, and I hope to see you all again tomorrow! Hugs ~ Mercy


Supplies

Stamps: Fancy Florals (Verve Visuals), Tres Chic, Stem Silhouettes

Paper: Soft Sky, Ruby Red, Wild Wasabi, Bashful Blue, Purely Pomegranate, Cutie Pie Designer Paper, Whisper White

Ink: same as paper, VersaMark

Accessories: brads, photo corner punch, ice stickles, sponge, ribbon, glassy glaze enamel