Pages

Showing posts with label Ways To Use It Challenge. Show all posts

Sunday, October 25, 2009

...You Give Me Strength

This is my submission for a couple of challenges this past week at SCS; the Ways To Use It Challenge #241 (Patched Up!), and the Inspiration Challenge #203 (Anthropologie). I chose to use the colors in these Blush Grove Tights as my starting point, then added stitching between my pieces of patterned paper to create a patchwork look. The patterned papers were from K & Company, and the bird was from the Birds and Blossoms Diecut set. The sentiment was from the Verve set, "Believe", and was stamped in Soft Suede Ink. I added some paper piercing to the focal panel and the large Sage Shadow Cardstock panel, then added some Rhinestones above the sentiment and in place of the bird's eye. I used the Scallop Edge Border Punch on the horizontal Melon Mambo Cardstock panel, then tied some So Saffron Grosgrain Ribbon around it. All of the panels were attached to each other and the So Saffron Cardstock base using Dimensionals.

That's it for me today! Thanks for stopping by, and I will see you again tomorrow with another creation! Until then...
Supplies
Stamps: Believe (Verve)
Papers: So Saffron, Melon Mambo, Sage Shadow, K & Company
Inks: Melon Mambo, Soft Suede
Accessories: mat pack, paper piercer, ribbon, scallop edge border punch, birds and blooms die, big shot, sponge dauber, sewing machine, rhinestones, dimensionals

Friday, June 26, 2009

...Hang In There

This is my submission for a couple of challenges this week: the My Favorite Things Sketch Challenge #87, and the Ways To Use It Challenge #224 at SCS. I started with a Kiwi Kiss Cardstock base, then matted the additional layers with Chocolate Chip Cardstock. The patterned papers were from the retired Hawaii Papaya Designer Series Paper pack, and the images were from Hero Arts' set "Playful Animals". The images were stamped in Basic Black Craft Ink onto Whisper White Cardstock, then embossed with Clear Embossing Powder and a Heat Gun. I colored the sweet monkey and leaves with Copic Sketch Markers, and created the oval focal panels using Spellbinders' Classic Oval Nestabilities and my Sizzix Big Shot. A piece of 5/8" Tangerine Tango Striped Grosgrain Ribbon was added to complete the card.

Speaking of little monkeys...I also wanted to share a picture that I took of my baby girl, Trinity, yesterday. The boys and I had a lazy day here at the house, and the dogs were no exception. How precious is this?!?
That's it for today! I will be stamping more this weekend, so I should have some stuff to show off later on. Thanks for stopping by, and until later...

Friday, May 29, 2009

...Ways To Use It Challenge #220

This is my submission for yesterday's Ways To Use It Challenge #220 at SCS...Buttons! I started with a Baja Breeze Cardstock base, and matted each additional layer with Kraft Cardstock. The patterned papers were from the Manchester Designer Series Paper pack, and the large plaid panel was pierced using a Mat Pack and Paper Piercer. The focal panel was created using the Sizzix Top Note Die and the Sizzix Big Shot. The leaves were from the Stampin' Up set "Wonderful You". They were stamped in VersaMark Ink, and embossed with Clear Embossing Powder and a Heat Gun. The sentiment was from Verve Visual's Plain Jane set "Proverbs 3:5", and was stamped in the same manner as the leaves using Always Artichoke Craft Ink instead of VersaMark. I punched the top note panel with the Horizontal Slot Punch, then ran some 5/8" Baja-Colored Grosgrain Ribbon through it to tie in a knot. The card was completed by adding a Baja-Colored Button and Linen Thread to the upper right-hand corner of the focal panel.

That's it for today! Thanks for stopping by, and I hope to see you all again tomorrow with a couple of sketch challenge cards. So until then...

Saturday, January 10, 2009

...Kristina's Color Inspiration #37, Ways To Use It Challenge #200

Edited to add a better photo of the card...I have sunlight to work with now! LOL!
This is my submission for a couple of challenges from earlier this week: Kristina Werner's Color Inspiration #37, and the Ways To Use It Challenge #200 from Thursday at SCS. For the WT we were to use stars in our design, and they took center stage in mine! These stars were taken from three different Verve Visual sets: "Polka Stars", "Swirly Stars", and "Seeing Stars". I used the following colors to create the star layers on Whisper White Cardstock: Chocolate Chip Classic Ink, Old Olive Classic Ink, Pumpkin Pie Classic Ink, and Baja Breeze Classic Ink. I stamped several stars directly onto the focal panel, then stamped extras on a scrap piece of white cardstock. I cut those out and layered them atop the ones already stamped on the panel using Dimensionals {or pieces of them depending on the size of the star}.

I used Chocolate Chip Cardstock to mat the focal panel, the row of Silver Brads along the top of the panel, the sentiment panel, and the Jumbo Pewter Eyelet. The focal panel was also pierced using a Mat Pack and Paper Piercer. The sentiment was from the Stampin' Up! set "Absolutely Fabulous", and it was stamped in Old Olive Craft Ink before being embossed with Clear Embossing Powder and a Heat Gun. Light Blue Kaiser Rhinestones were added to the centers of the five stars that stand up from the base, and along the bottom of the sentiment panel. A piece of 5/8" Chocolate Chip Grosgrain Ribbon was added through the eyelet, and tied off using Silver Cording to complete the card.

That's it for today! I will spending the day stamping with Pam Varnell again, so I should have quite a bit to share for the next week or so. I will be working on several blog challenges that were posted this week, and I will be working on a sample for the upcoming sketch challenge for Tuesday here. Thanks so much for stopping by, and I will see you all again tomorrow! Until then...


Supplies:
Stamps: Polka Stars, Swirly Stars, Seeing Stars (Verve Visual), Absolutely Fabulous (SU!)
Papers: Baja Breeze, Chocolate Chip, Whisper White
Inks: Baja Breeze, Chocolate Chip, Pumpkin Pie, Old Olive (Classic & Craft)
Accessories: mat pack, paper piercer, brads, jumbo eyelet, rhinestones, dimensionals, embossing buddy, clear embossing powder, heat gun, crop-a-dile, 1/4" circle punch, 1-3/8" circle punch, acrylic blocks, scissors, ribbon, cording

Saturday, January 3, 2009

...A Ways To Use It Inspirational Sketch

This is my submission for the following challenges at Splitcoaststampers.com: the Sketch Challenge #204 (self-explanatory), the Inspiration Challenge #161 (Cake Noveau), and the Ways To Use It Challenge #199 (using silver in creation...my brads). I chose the Rattlesnake cake (page one, first row, third picture) as my inspirational piece for today.

I started with a Chocolate Chip Cardstock base, then matted each additional layer with Pumpkin Pie Cardstock (except for the focal panel...it is chocolate also). The patterned papers are all from the Sweet Always Designer Series Paper pack, and the bottom layer was pierced using a Mat Pack and Paper Piercer. A piece of 5/8" Chocolate Chip Grosgrain Ribbon was added around the lower panels before the focal panel was attached to the base. The focal panel was cut using SpellBinders' Classic Rectangle Nestabilities, then the edges were pierced using a Mat Pack and Paper Piercer. The heart, from the set "Just Celebrate", was stamped in Graphite Black Brilliance Ink then embossed with Clear Embossing Powder and a Heat Gun. I colored the heart using Copic Sketch Markers, then added the sentiment (from the "Happy Heart Day") in Graphite Black Brilliance Ink also. Three Jumbo Silver Brads were added to the bottom of the panel before it was attached to the base using Dimensionals.

That's it for today! I have a laundry room piled high with dirty clothes, and if I don't want the family running around naked this week I had better get to washing! LOL! I want to thank you all for stopping by, and I hope to see you again tomorrow with a card for the Featured Stamper Challenge at SCS. Until then...

Supplies

Stamps: Just Celebrate, Happy Heart Day

Papers: Chocolate Chip, Pumpkin Pie, Whisper White, Sweet Always Designer Series Papers

Inks: Graphite Black Brilliance Ink

Accessories: mat pack, paper piercer, ribbon, dimensionals, jumbo brads, nesties,sizzix big shot, clear embossing powder, heat gun, copic sketch markers, scissors

Thursday, September 11, 2008

...Ways To Use It #183

This is my submission for today's Ways To Use It Challenge at SCS. We were to use our white gel pens in some way, so I used mine around the focal panel to create some dots to draw your eye to the center. I love the colors in the Bella Rose Designer Series Papers, and I was lucky enough to be able to borrow the "Only Ovals" set from my dear friend, Pam Varnell. I stamped the image in several different colors that were present in the designer paper, then pieced it together to add little pops of color. I also got to use some Oval Nestabilities...LOVE THEM!!! Just one more thing I have to purchase...I'm sure the hubby will love that! LOL!

That's it for today! Thanks for stopping by, and I will see you all again tomorrow. Until then...


Supplies
Stamps: Only Ovals
Papers: Riding Hood Red, Basic Black, Kiwi Kiss, Bella Rose Designer Series Papers, Whisper White
Inks: Jet Black Staz-On, Riding Hood Red, Kiwi Kiss
Accessories: signo gel pen, nesties, rhinestones, ticket corner punch, scallop edge punch, scissors, ribbon, dimensionals, paper piercer

Monday, July 28, 2008

...Dirty Dares

This is my submission for a couple of Dirty Dares at SCS. Holly McMillen (DTGD08Holly) posted a sketch challenge, and Kittie Carrachiolo (DTGD08Kittie) posted a challenge to create a scene on your card...so I combined the two. I used the "Neighborhood" roller to create a scene, and watercolored the scene with markers. The sentiment is from "Short & Sweet", and it is stamped in Jet Black Staz-On Ink. I used Bashful Blue, Old Olive, and Real Red as my color combination.


This card is a submission for four challenges at SCS! I combined last week's Ways To Use It Challenge #176 (Negative Thoughts), DTGD08Joan (Joan Ervin's challenge to create card using silhouettes), DTGD08Natasha (Natasha Trupp's sketch challenge), and DTGD08Lindsey (Lindsey Botkin's faux stitching and color challenge). I used Verve Visual's set "Serenity". Pink Pirouette, Basic Black, and Whisper White were used as my color scheme with this creation.

That's it for today! Thanks for stopping by today, and I will see you tomorrow with another installment of Mercy's Tuesday Sketch Challenge. Until then.......


Thursday, July 3, 2008

...Sketch Challenge #183, Ways To Use It Challenge #173, Kristina's Color Challenge #14, & A Winner !!!


This is my submission for yesterday's Sketch Challenge at SCS, and Kristina's Color Inspiration #14 Challenge . I started with a Kraft Cardstock (Layer 1) card base (6-5/8 X 6-1/2), and when it was folded in half it measured 6-5/8 X 3-1/4. All of the images are from SU's Level Two Hostess Set "Spring Solitude". Basic Black Cardstock (Layer 3 : 4-1/4 X 3-1/8) was stamped with the flower trio stamp in Whisper White Craft Ink, and was embossed with Stampendous White Embossing Powder. A piece of Real Red 5/8" Grosgrain Ribbon was tied around the center of the panel, and the completed panel was attached to the card base using Dimensionals. A piece of Whisper White Cardstock (Layer 2 : 2-1/2 X 1-7/8) was added beside the black panel, and was attached to the card base using SNAIL Adhesive. The focal panel (Layer 4) consisted of Basic Black Cardstock (4-3/16 X 2-3/16), Kraft Cardstock (4-1/16 X 2-1/16), and Whisper White Cardstock (4 X 2). The branch and bird images were stamped in Jet Black Staz-On Ink onto the white panel using a Stamp-a-ma-jig and Image Sheet for placement. The bird was stamped again onto a scrap piece of white paper, cut out using CutterBee Scissors, and placed over the black bird using a Dimensional. The sentiment was stamped twice: once in Real Red Classic Ink onto white cardstock, and again in black on Real Red Cardstock. The red "thank" was punched out using the Small Oval Punch, and was matted onto black cardstock that was punched out with the Large Oval Punch. The black "you" was cut down using a Paper Cutter, and was attached to the ovals using SNAIL Adhesive. Black Brads were added below layer two and to the sentiment panel to finish off the card.

This is my submission for today's Ways To Use It Challenge on SCS. We were to score our creations in some way, so I scored the Old Olive Cardstock card base (8-1/2 X 5-1/2) under the sentiment panel. The sentiment panel consisted of Whisper White Cardstock (4-1/4 X 2-1/4), Bravo Burgundy Cardstock (4-1/4 X 5/16), and a piece of designer paper from BasicGrey's Figgy 6X6 Paper Pad (4-1/4 X 1-1/2). The sentiment was from the set "Hugs & Wishes", and was stamped in Jet Black Staz-On Ink using a Stamp-a-ma-jig and Image Sheet for placement. The layers were attached to the white cardstock with SNAIL Adhesive, and the completed panel was attached to the card base using Dimensionals. A piece of Teal 5/8" Grosgrain Ribbon was added to the panel, and three Black Brads were placed above the panel using a Mat Pack (for placement) and Paper Piercer to finish off the card.Now on to the winner of the blog candy! My husband chose #52 .................... Janet Beahm (harley7312)!

harley7312 said...
Mercy, your blog is fantastic! I love both the cards and the music! Your are a very talented lady and I am privileged to know you! Congrats on your number of hits! Keep up the great work!
Janet
June 29, 2008 5:06 AM

This absolutely cracks me up! I just met Janet last month at a "Scrampin' Event" in my area, and I knew instantly that we would be good friends! She was also a guest at Pam Varnell's last weekend for our stampin' extravaganza, so I got to spend some quality time with her. Congrats, Janet....you owe my hubby one!!!! LOL! Shoot me an email to let me know when and where you want to meet to get your goodies. Thanks to everyone who left comments and entered to win. I have made some wonderful friends online, and I appreciate your faithful readership. It's because of all of you that I can celebrate these wonderful milestones. {{{{BIG CYBER HUGS}}}}

That's it for today! I will see you all again tomorrow with another creation of some sort. Until then.......


Thursday, June 26, 2008

...Ways To Use It Challenge #172, & 50K Hits Blog Candy !!!

Let's start off today with the card that I submitted for today's Ways To Use It Challenge at SCS. We were to incorporate birds into our layouts, so I used the birds and branches from the set "Silhouettes" by See-D's. I started with a Ruby Red Cardstock base that measured 10 X 5 to create a 5" square card. The striped panel consisted of Old Olive Designer Series Paper (5 X 2-3/4) and Basic Black Cardstock (5 X 3). The two papers were attached to each other using SNAIL Adhesive, then the panel was faux stitched using a Mat Pack, Paper Piercer, and a Basic Black Stampin' Write Marker. The completed panel was attached to the card base using the same adhesive.

The focal panel was Whisper White Cardstock (3-3/4 X 2-3/4) and Basic Black Cardstock (3-7/8 X 2-7/8). The birds were stamped twice onto the white cardstock in Ruby Red Classic Ink, and Crystal Stickles were used to add some sparkle to the birds. Once the birds were dry, the branches were stamped in both Old Olive Classic Ink and Certainly Celery Classic Ink. I used a Brayer & Rubber Attachment to create the sky by rolling over the entire image with Soft Sky Classic Ink. The two pieces of cardstock were attached to each other with adhesive, then a piece of Black Organdy Ribbon was tied in a knot at the bottom of the panel. The completed panel was attached to the card base using Dimensionals. The sentiment reads, "Wishing You Well", and it is from the Verve Visual set "Wonderful Wishes". It was stamped in Jet Black Staz-On Ink onto a scrap piece of Certainly Celery Cardstock, then punched out using the 1" Circle Punch. The punched sentiment piece was mounted onto Ruby Red Cardstock that had been punched using the 1-1/4" Circle Punch. Those pieces were then mounted to some Basic Black Cardstock that was punched out using the 1-3/8" Circle Punch. Three Baby Blue KaiserScrapbook Rhinestones were added just above the words on the sentiment piece, then the completed panel was attached to the card base with Dimensionals.

That's it for the card...now on to the goodies! Since my hits counter passed 50,000 some time yesterday, I want to offer some blog candy to a lucky winner. All you have to do to win is leave a comment at THIS post. I will announce the winner on Thursday, July 3rd. Here's what you can receive if your name is chosen:

  • One (1) pack of Love & Happiness Rub Ons (from SU's Sale-a-Bration promotion: this includes a sheet in each of the following colors: Black, White, Olive, and Chocolate)
  • One (1) "Friendship Blooms" stamp set (also from SU's Sale-a-Bration promotion)
  • Twelve (12) Chipboard Hearts
  • Eight (8) Chipboard Stars
  • One (1) spool of 5/8" White Ribbon (8 yards)
  • Assorted Designer Series Papers (6X6 pieces from the following: Afternoon Tea, Berry Bliss, and Summer Picnic)
Thanks so much for your faithful readership, and for all of the kind and wonderful comments you've left over the last several months. I can't tell you how much I have appreciated hearing from all of you! Thanks for stopping by today, and I will see you again tomorrow. Until then....


Thursday, May 22, 2008

...A Triple Challenge Card(CC167, SC177, WT167), and Featured Stamper #67


This is my card for THREE challenges on SCS: Color Challenge, Sketch Challenge, and Ways To Use It.....GO ME!!!! The colors we were to incorporate are as follows: Blue Bayou, Soft Sky, and Certainly Celery. The Sketch Challenge can be seen above, and the Ways To Use It Challenge was to create a masculine card. I wasn't sure if the Blue Bayou Double-Stitched Ribbon would qualify as a masculine accent, so I placed it on an element that could be removed if needed. The background is stamped with Canvas in Certainly Celery Classic Ink. The focal image consists of the pine tree from Lovely As A Tree in Blue Bayou Classic Ink, and the sentiment was from Live Your Dreams in Jet Black Staz-On Ink. I used a Stamp-a-ma-jig and Image Sheet for proper placement. The sky was created by using a Brayer that was rolled in Soft Sky Classic Ink. I also used the 1/4" Circle Punch to lay Blue Bayou cardstock circles under the Silver Brads on the upper and lower panels.

And yet another card for an SCS challenge: Featured Stamper. The lucky, and UBER-talented, recipient this past Sunday was Dawn McVey...aka dawnsing. She has a brilliant eye for clean and crisp colors and layouts...I absolutely love her. She is also a fellow GreatSwaps Girl! You can check out her blog HERE. I chose to CASE the card seen HERE in her SCS gallery, because I adored the layout. I changed everything except the layout in order to make it my own. The card base was Bashful Blue cardstock, and I used scrap pieces of patterned papers from the Summer Picnic Designer Series Paper, and Old Olive Designer Series Paper packs to create the different stripes. They are matted onto Old Olive cardstock, and a strip of olive cardstock was pierced using a Mat Pack and Paper Piercer also to cover the seam between the red dotted and olive striped papers. A piece of 1/4" Whisper White Grosgrain Ribbon was tied around the seam between the olive striped paper and cherry paper.

The sentiment from Always was stamped in Jet Black Staz-On Ink onto Whisper White cardstock, then was punched out using the 1-1/4" Circle Punch. A scrap piece of Old Olive cardstock was also punched out using the 1-3/8" Circle Punch, then some Real Red cardstock was punched out with the Scalloped Circle Punch. Each layer was attached to the other using SNAIL Adhesive, then one of the small flowers (also from the set Always) was stamped in Bashful Blue Classic Ink onto Bashful Blue cardstock. The stamped flower was punched out using the 1/2" Circle punch, a White Brad was added to the center, and the flower circle was added to the center of the "a" using a Dimensional.

That's it for today! Thanks for stopping by, and I'll see you all again tomorrow.


Wednesday, May 21, 2008

...Cards From A Day With My Nieces

Happy Hump Day, everyone! I got to spend the afternoon and evening with my nieces, Brooke and Leighanne, this past Sunday. We sat at their dining room table and made cards for quite a while...I had a blast! These are the three cards I made using designer paper scraps. Now.....on to the details!

I MISS YOU: The card base is Kraft cardstock (11 X 4-1/4), and the designer papers are from the BasicGray Infusion 6X6 Paper Pad. The pink piece measures 4-1/4 X 1-1/4, and the patterned paper measures 4-1/4 X 1-3/4. They are attached to the card base using SNAIL Adhesive, and 5/8" Regal Rose Grosgrain Ribbon was added where the two pieces met. The sentiment is a Michael's $1 stamp, and it was stamped in Jet Black Staz-On Ink using a Stamp-a-ma-jig and Image Sheet for placement. So simple!
CHERISH: I absolutely love these colors together, so you may see them over and over again in the future! LOL! I also love the stamp set Baroque Motifs, so I used the stamps from that set only to make this card. I started with an Old Olive cardstock base (7 X 6-5/8) which was stamped with the flourish in opposite corners using Chocolate Chip Classic Ink. The next panel up consists of River Rock cardstock (6-1/8 X 2-7/8) and Brocade Backgrounds Designer Series Paper (6 X 2-3/4), which was sponged with Close to Cocoa Classic Ink using a Sponge Dauber. A piece of 1" Chocolate Chip Satin Ribbon was added to the center of the panel and tied into a bow, then "cherish" was stamped in Chocolate Chip Classic Ink into the upper left-hand corner of the designer paper panel. The panel was attached to the card base using Dimensionals.

The large flower was stamped three separate times in VersaMark Ink onto a scrap piece of River Rock cardstock, then each was embossed with Moss Embossing Powder and a Heat Gun. The flowers were cut out using CutterBee Scissors and set aside. The small flower was also stamped in VersaMark Ink three times, but they were embossed using Copper Embossing Powder instead of moss. After the small flowers were cut out, they were attached to the centers of the large flowers using Dimensionals. The completed blossoms were attached to the designer paper panel using Dimesionals once again to finish off the card.

THINKING OF YOU: This final card is my submission for this past Thursday's Ways To Use It Challenge at SCS. We were to use "inchies" in our card designs, so I used 1X1 pieces of designer paper on mine. I started with a card base of River Rock cardstock (11 X 4-1/4) which was stamped in River Rock Classic Ink with my favorite background stamp....Tres Chic. The striped panel was made from the Ginger Blossoms Designer Series Paper pack, and it measures 4-1/4 X1-1/2. A piece of 5/8" Regal Rose Grosgrain Ribbon was added to the center of that striped panel, then the complete panel is attached to the card base using SNAIL Adhesive.

The square focal panel was made up of Ruby Red cardstock (2-1/2 X 2-1/2) and River Rock cardstock (2-3/8 X 2-3/8). The river rock cardstock was actually a leftover from one of my old cards, and it had been stamped with the same background stamp that I was using for this card. Coincidence? I think not! The panel was then attached to the card base using Dimensionals. The two flower print squares are from the Ginger Blossom Designer Series Paper pack; the swirly piece in the upper left corner is from the Groovy Guava Designer Series Paper pack; and the polka dotted square in the lower right corner is from the Regal Rose Designer Series Paper pack. The sentiment is another Michael's $1 stamp, and was stamped onto the polka dotted square in Jet Black Staz-On Ink. Each of the squares measured 1 X 1, and they were attached to the square focal panel using Dimensionals.

That's it for today! I hope to see you all again tomorrow! Hugs ~ Mercy

Thursday, April 24, 2008

...Ways To Use It Challenge #163


This is my submission for today's Ways To Use It Challenge ~ Snip, Snip ~ at SCS. We were to incorporate a creative use of scissors in our designs. I started with a Bashful Blue Cardstock base, and layered it with the following: Basic Black Cardstock, Whisper White Cardstock, and Summer Picnic Designer Series Paper (DSP). The red flower was created by stamping a scrap piece of Real Red Textured Cardstock with one of the flowers from the set "Stitched Exotics" in Jet Black Staz-On Ink. It was cut out using CutterBee Scissors, then a Pewter Build-a-Brad was added to its center. The sentiment was from the set "Fabulous Flowers", and it was stamped in Real Red Classic Ink before it was colored with a Certainly Celery Stampin' Write Marker.

Three Real Red Cardstock circles were punched out using the 1/4" Circle Punch, then an Old Olive Brad was added to the center of each and attached to the DSP panel. Each layer (including the flower) was attached to the card base using Dimensionals. The scissors were then used to snip the edge of the card where it opens...and there you have it!

That's it for today! I will be back tomorrow to share a creation for the Limited Supplies Challenge, and to give you all an update on Christian. I have also received a couple of awards, so I will catch up on those, too! Until then....Hugs ~ Mercy

Supplies

Stamps: Stitched Exotics, Fabulous Flowers

Paper: Bashful Blue, Whisper White, Basic Black, Real Red Textured, Summer Picnic DSP

Ink: Jet Black Staz-On, Real Red Classic Ink

Accessories: stamp-a-ma-jig, image sheet, dimensionals, build-a-brads, brads, scissors, circle punches (1/4" and 3/4"), marker

Friday, April 18, 2008

...A Sketch Challenge, A Ways To Use It Challenge, and Another Card

This is my submission for yesterday's Sketch Challenge and today's Ways To Use It Challenge at SCS. The sketch is pretty self-explanatory, but the WT challenge was to incorporate some form of acrylic into your design; so I used some acylic dew drops in the right corners of my card. I used Spring Break Designer Series Papers and Summer Picnic Designer Series Papers. The image from the set Fast & Fun Notes, and it was Watercolored Using Markers and an aquapainter.
This card was simply a fluke! I started out making a card with a totally different layout and color scheme, but this is what I ended up with....and I L-O-V-E it! I used some of the Bali Breeze Designer Paper on this one, then stamped the hummingbird from "Pretty Amazing" with Staz-On ink onto a scrap piece that I had left over from the "Ink, Spray, and Smash Technique" that we did a while back. The card base was stamped with the Stitched background stamp, and River Rock ribbon was added to finish it off.

That's it for today, but I hope you'll come back tomorrow to see what I've created for the Limited Supplies Challenge. Until then....Hugs ~ Mercy

Supplies
Stamps: Fast & Fun Notes, Pretty Amazing, Touch of Nature, Stitched
Papers: Bashful Blue, Real Red, Wild Wasabi, Pumpkin Pie, Whisper White, Spring Break DSP, Summer Picnic DSP, River Rock, Taken With Teal, Bali Breeze DSP, Glossy White, watercolor
Inks: Jet Black Staz-On, reinkers (Tempting Turquoise, Green Galore)
Accessories: ribbon, dew drops, scissors, dimensionals, stamp-a-ma-jig, image sheet, markers, aquapainter, adhesive, paper cutter

Friday, February 29, 2008

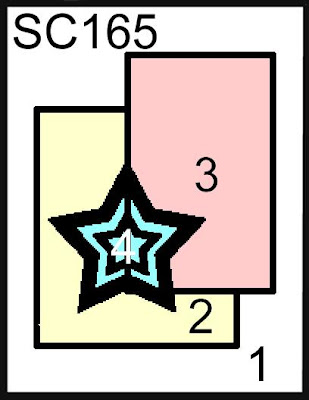
...Sketch Challenge #165, & Ways To Use It #155

These are my submissions for Tuesday's Sketch Challenge at SCS. This first one is also for yesterday's Ways To Use It Challenge. We were to make a card that was inspired by a song, so I made this first one as a tribute to Bryan Adams' song "Everything I Do (I Do It For You)". This song is actually mine and my husband's song from when we were dating. He even took the time to learn how to play it on his guitar for me.......ain't he sweet?!? I'm such a sucker for romance! Anywhoooo....on to the card.....This first one started with a card base of Ruby Red cardstock that opens at the right. The striped panel consists of Western Sky Designer Series Paper, and Blue Bayou cardstock. The sentiment panel is made up of Spring Showers Designer Series Paper (retired), and Blue Bayou cardstock again. The sentiments are from the set "Always", and were stamped in Staz-On Black Ink using a Stamp-a-ma-jig and Image Sheet for proper placement. The large and small flower on the medallion are from the set "One of a Kind", and the round piece in between the two is from the set "Boho Backgrounds". All of the elements were stamped in Staz-On Black Ink onto Whisper White cardstock, and were watercolored using Blender Pens and the following ink pads: Blue Bayou Classic Ink, Ruby Red Classic Ink, and Soft Sky Classic Ink. Once the ink dried, the large and small flowers were cut out using CutterBee Scissors. The round piece was punched out using the 1-1/4" Circle Punch. Several colors of Stickles were added to all three pieces and allowed to dry, then a White Brad was added to the center of the smallest flower using a Paper Piercer. Each layer was attached to the other using Dimensionals, and then attached to the card base with Dimensionals, too. Blue Bayou cardstock was punched three times using the 1/4" Circle Punch, and White Brads were added to the center of each. The small circles were then attached to the card base, and then held in place by opening the backs of the brads on the back of the card base front.

This second one was a fluke! I was just playing around with the new felt flowers from Accents & Elements "Flower Fusion" Tin when the card popped into my head. I started with a card base of Chocolate Chip cardstock that opens at the bottom, then layered a piece of Pumpkin Pie cardstock on top of it. The center panels consist of Old Olive cardstock and Rose Red cardstock. The edges of all of the panels were faux stitched using a Mat Pack, a Paper Piercer, and the fine tip of a Chocolate Chip Stampin' Write Marker. The flower medallion was attached to the panels using a Pink Jumbo Brad, and the sentiment, from the set "Sweet Sampler", was stamped in Chocolate Chip Classic Ink onto the olive panel using a Stamp-a-ma-jig and Image Sheet for proper placement. How simple was that?

That's it for today, but I hope to have a card for the Limited Supplies Challenge and Inspiration Challenge for you tomorrow. I wanted to leave you with an update on my son, Christian. We went to the cardiologist on Tuesday, and they ran several tests: an EKG, several chest films, and a chest ultrasound. The results from the ultrasound showed that his heart is structurally sound, but the EKG showed extra beats that shouldn't be there. The cardiologist fit him with a Holter Monitor that had to be worn for 24 hours, so we took the monitor back on Wednesday for analysis. We are in "wait mode" now until the results from the monitor come back. If the results come back alright, then we are finished and Christian can return to basketball; but if something shows up from the monitor, then he has to undergo a stress test some time next week. It has been really stressful for everyone, especially Christian, to think that our otherwise healthy 14 year-old son could have a major heart problem...but we are hopeful (and prayerful) that everything will turn out alright. I appreciate all of the prayers and well wishes that have been sent our way! We ask that you continue to mention us in your prayers, and I will keep you all posted when we receive more news.

Hugs ~ Mercy

Saturday, February 23, 2008

...Ways To Use It Challenge #154 & Inspiration Challenge #116

This is my submission for Thursday's Ways To Use It Challenge (WT), and today's Inspiration Challenge (IC) at SCS. The WT for this week was to make a card using windows, and today's IC came from a picture in the Country Living Magazine seen below the card: I started with a card base of Groovy Guava cardstock that measured 11 X 4-1/4, and when folded in half to open at the right measured 5-1/2 X 4-1/4. The striped paper is from BasicGrey's Stella Ruby 6X6 Paper Pad, and it measures 5-1/2 X 2. It was attached to the card base using SNAIL Adhesive. The focal panel was made up of the following papers and dimensions: Whisper White cardstock (5-1/2 X 2), Chocolate Chip cardstock (three pieces measuring 1-1/2 square), and green designer paper from BasicGrey's Mellow 6X6 Paper Pad (5-1/2 X 2-1/4). I used the 1-3/8" Circle Punch to make three windows in the green designer paper, then used the 1-1/4" Circle Punch to make windows in the centers of all three of the chocolate cardstock squares. The green and chocolate papers were attached to each other using Dimensionals so that the chocolate would peek out from behind the green.

The focal image is from the set "Happy Heart Day", and it was stamped in Staz-On Black Ink onto the white cardstock. I placed the window panel over the white cardstock first, then stamped the image through each window. The flowers were colored using Derwent's Studio Colour Pencils, Mineral Spirits, and Blending Stumps. The window panel was then attached to the colored image panel with Dimensionals. The completed focal panel was attached to the cardbase using SNAIL Adhesive. A piece of 5/8" Chocolate Chip Grosgrain Ribbon was added between the focal panel and striped panel, then finished in a knot. The sentiment is from the set "It's Your Birthday", and was stamped in Basic Brown Classic Ink in the upper right side of the card using a Stamp-a-ma-jig and Image Sheet for proper placement.

That's it for now.....I may be back later with a creation for Friday's Limited Supplies Challenge (I'm not looking forward to that one, because I have to incorporate my handwriting....and I hate my handwriting!) Until later on.....Hugs ~ Mercy

Supplies
Stamps: Happy Heart Day, It's Your Birthday
Paper: Groovy Guava, Whisper White, Chocolate Chip, Mellow, Stella Ruby
Ink: Staz-On Black, Basic Brown
Accessories: ribbon, dimensionals, adhesive, color pencils, mineral spirits, blending stumps, circle punches (1-3/8 and 1-1/4)

Thursday, February 7, 2008

...Ways To Use It Challenge #152, RAK, and a Funny

This is my submission for today's Ways To Use It Challenge at SCS...Going Dotty! I started with a card base of Certainly Celery cardstock (6-7/8 X 6-5/8), and when folded in half to open at the bottom measures 6-5/8 X 3-1/2. The polka dotted paper is Close To Cocoa Designer Series Paper cut to 6-5/8 X 1-1/8. The cocoa designer paper (dp) was attached to the card base using SNAIL Adhesive. I tied a piece of 5/8" Real Red Grosgrain Ribbon over the top of the dp into a simple knot. A Mini Glue Dot was placed under the knot to keep it in place. I used Staples and a Stapler to secure the ribbon to the card base. The sentiment is from the set "So Much" and is stamped in Wild Wasabi Classic Ink directly onto the card base. I used a Stamp-a-ma-jig and Image Sheet in order to make the word straight....I can't stand crooked sentiments (a little pet peeve of mine)! I then used the Coluzzle Cutting System to cut a piece of Real Red cardstock into a thin circle, and adhered it to the card base using the scrap pieces of foam from the sides of a Dimensional Sheet.

The flower from "So Much" was stamped in Basic Brown Classic Ink onto Watercolor Paper, then watercolored with an Aquapainter in Certainly Celery Classic Ink. Once dried, it was cut out using CutterBee Scissors. I created the sparkly cocoa brad by applying Cinnamon Stickles to a Clear Rhinestone Brad and allowing it to dry completely. The brad was then placed in the center of the celery bloom, and attached to the card base with double-stacked Dimensionals.


This card was an RAK from Janet McAfee (aka bluemoon). She was the winner of my last blog candy giveaway. This was an adorable thank you card for the stuff she won.......how sweet was that?! Thanks so much, Janet!

Now for a funny.......I received an email today entitled "A Few Thoughts On Cat Baths From the Cat". This was one of the pictures included on the email, and I just howled when I saw it! The caption under it read: "Traction, traction.......I'm losing traction!" Bless its little heart! I will share another one with you tomorrow. Thanks for the hilarious email Robin E.......too funny!

That's it for today! I'll see you all tomorrow. My oldest son starts a basketball tournament tonight but it is single eliminations, so if they lose it's all over for them. Keep your fingers crossed for us! Until later.......Hugs ~ Mercy

Supplies

Stamps: So Much

Paper: Certainly Celery, Real Red, Close to Cocoa DSP, watercolor

Ink: Basic Brown, Wild Wasabi, Certainly Celery

Accessories: coluzzle, adhesive, glue dot, scissors, dimensionals, aquapainters, stickles, stamp-a-ma-jig, image sheet, brad, stapler, staples, ribbon

Thursday, January 31, 2008

...Ways To Use It Challenge #151 ~ Stapled Thanks

  • This is my submission for today's Ways To Use It Challenge at SCS. We were to incorporate staples into our card designs, so I used mine to attach the striped panel to the card base. The card base is Whisper White cardstock measuring 6-3/4" X 3-1/2" when folded. The striped panel is made up of Spring Break Designer Series Paper (1" X 6-3/4") and Blue Bayou cardstock (1-1/4" X 6-3/4"). I used the 1/2" Circle Punch to punch a half-circle at each end of this panel, then used a Stapler to staple the panel onto the card base. A Mat Pack and Pumpkin Pie Marker were used to create the dotted outline above and below the striped piece. A 1/4" Circle Punch was used to make smaller half-circles on the card base inside the larger ones.

  • The focal panel consists of the following cardstocks and measurements: Blue Bayou (2-3/4" X 2-1/4"), Old Olive (2-1/2" X 2"), and Whisper White (2" X 1-3/4"). The white piece is stamped using the set "Bursting With Joy" in Old Olive Classic Ink. Each piece of cardstock was attached to the other using SNAIL Adhesive, then the flourish panel was attached to the card base using Dimensionals. The next layer up is the "laugh" image from the set "Lovely Labels" stamped in Soft Sky Classic Ink onto white cardstock. It was punched out using the 1-1/4" Circle Punch, then a piece of Soft Sky cardstock was punched out using the 1-3/8" Circle Punch. The two circles were attached to each other using SNAIL Adhesive. The sentiment is the same stamp that was used to create the background flourish; but it was stamped in Pumpkin Pie Classic Ink onto white cardstock, cut out using a Paper Cutter, then sponged using a Sponge Dauber in the same pumpkin ink. The sentiment was attached on top of the sky circles with Dimensionals.

  • That's it for today! Tomorrow is the Limited Supplies Challenge, so I hope to have another card (or something) to share with you. We're off to get our taxes done tonight, so wish us luck! Until then......Hugs ~ Mercy

Supplies

Stamps: Bursting With Joy, Lovely Labels

Paper: Whisper White, Blue Bayou, Old Olive, Soft Sky, Spring Break Designer Series Paper

Ink: Old Olive, Soft Sky, Pumpkin Pie

Accessories: punches (1/2", 1/4", 1-3/8", 1-1/4", stapler, staples, Pumpkin Pie Marker, mat pack, dimensionals, adhesive, paper cutter, sponge dauber

Saturday, January 5, 2008

...Ways To Use It Challenge #147 & Limited Supplies Challenge #149


This was my submission for Thursday's Ways To Use It (WT) and yesterday's Limited Supplies Challenge (LSC). I have had many people wanting me to make more altered projects, so this was the perfect opportunity to do just that...an Altered Chipboard Picture Frame. The WT was to use flowers in any way we wanted, so I built this flower using Silk Flower Arrangements around the house. Ten petals of various sizes were arranged, and were then held together with a beautiful Pearl Brad. The LSC was to NOT use any shade of white or vanilla...Jen actually named this challenge "What?"...and that said it all! The Chipboard Picture Frame (by Creative Imaginations) was painted with Black Acrylic Paint and a Sponge Brush. Once dried, the front was covered with a piece of designer paper from BasicGrey's Scarlett's Letter collection. Mod Podge was used as an adhesive, and a generous coat was painted onto the frame with another sponge brush. Special care was taken to remove any air pockets or bubbles that appeared under the paper. The frame was placed upside down onto the table with a couple of heavy books on top until it had dried completely. A Sponge Dauber was used to sponge Basic Black ink around all of the edges (the outside of the frame and the frame window). The outside edges of the frame were sanded down with Sanding Blocks to make them more uniform. Another coat of Mod Podge was painted over the frame front, and was then set aside to dry.


The sentiment (from Shakespeare's "Venus and Adonus") is one of my personal favorites . It reads, "Love comforteth like the sunshine after rain." PhotoShop was used to configure the layout and font of the sentiment, then printed onto an 8-1/2" X 11" piece of Gray Vellum Paper. The wet ink on the vellum was allowed to dry completely, then the vellum was cut down to the exact size of the frame window. A piece of thick, clear plastic was used inside the frame window (instead of glass), so the sentiment panel was placed behind it. The flower was secured to the lower left corner of the frame window with Pop-Up Glue Dots.


That's it for today...so what do you think? I had a blast working on this, so I have made plans to make at least one altered project a week. You all have made some wonderful suggestions in your blog candy comments, and I am going to try to honor each of them with my creations tis upcoming year. Thanks for stopping by today, and don't forget to leave a comment on the post above to win some BLOG CANDY if you haven;t already made one. Thanks also for all of your kind words and encouragement! You are my inspiration, and I love creating artwork to share with you. So until next time...Hugs ~ Mercy


Supplies


Paper: Scarlett's Letter paper (BasicGrey)


Ink: Basic Black, Gray Vellum


Accessories: Chipboard Picture Frame (Creative Imaginations), silk flowers, pearl brad, acrylic paint, foam brushes, sponge dauber, glue dots, Mod Podge, computer and printer