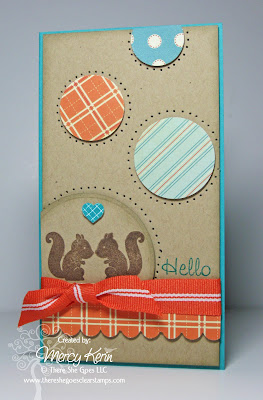
CIRCLE PIERCING TUTORIAL
Here's what you'll need to get started:
Paper Piercer
Piercing Mat
Plastic Canvas Mesh Shape- Round
(you can find these at your local craft store in the needlework section in several different shapes)
An Assembled Card Front
Step One: Place card front onto piercing mat.
Step Two: Using grid on the center of the plastic mesh, line up the outside of your patterned paper circles or other circular element. Pierce around the entire element using the mesh shape as a guide. You can pierce the circular element, or pierce around the outside of it as I did.
Step Three: Remove mesh shape guide to reveal your piercing.
Step Four: Pierce around all the patterned paper circles, and attach the card front to the card base to complete your card.
STAMPS USED: Spring Fever (There She Goes)
***I also made a scrapbook layout inspired by the card above! Aren't my fellas gorgeous?!?***
STAMPS USED: Chemistry (There She Goes)
That's it for me! I hope you enjoyed this tutorial. Give this technique a try, then come back here to link your project that incorporates Circle Piercing below. Thanks for stopping by, and I can't wait to see your creations!

Supplies
Stamps: Spring Fever, Chemistry (There She Goes)
Papers: Bermuda Bay, Kraft, PTI White, Lil' Man DP (Cosmo Cricket)
Inks: Bermuda Bay, Rich Cocoa, Sahara Sand
Accessories: dimensionals, circle punches, circle piercing guide, nesties, big shot, scissors, border punches, ribbon, sponge dauber, sewing machine, silver pearls


13 comments:
WOW! thank you so much for the tutorial!
Very cool! Thanks for sharing and I love your layout!
thanks for sharing this, Mercy! love it!
smart idea! thanks for sharing!
Awesome! I need to head to the needlepoint section today and pick up one of these. I love learning new techniques like this. Thank you!
Fabulous! Love those circles and the piercing around them. :o)
Fabulous tutorial Mercy!! I'm going to try to get something made for this! I bought one of those circle things this weekend. :D
Cool! I never thought of piercing outside a circle. Your page looks wonderful!!!
This is awesome!! Thank you!!
This is so clever.....thanks so much for the tutorial!!!!!
That's really neat Mercy, i'm sure i've got a template similar to that, will have to have a rack about see if i can find it. Love the Scrapbook page:)
Suzi
xxx
I love this... I NEED ONE.. but guess what.. not seen one of those in the uk !!! absolutely fabby
LOVE this idea, Mercy! Thanks so much! My Mom found this on your blog one day, and shared it with me! So, we got together this weekend and created our own version! I've just posted a photo of our card on my blog, if you'd like to see it :) Such a clever idea, thanks!
Hugs,
Dee (Spryte)
Post a Comment